
ネットワーク技術力向上のために購入した書籍「ネットワーク超入門」内の演習をCisco Packet Tracer で実際にやってみました。
前回の「スタティックルート」を駆使してネットワークを構築しました。
今回は「ダイナミックルーティング」の演習を実演したいと思います。
ルーティングプロトコルは小規模ネットワーク向けのRIPです。
前回の「スタティックルート」の記事↓↓
hlse.hateblo.jp
対象書籍
書籍名:ネットワーク超入門 手を動かしながら学ぶIPネットワーク
著者:GENE
出版社:技術評論社
Cisco Packet Tracer(パケットトレーサー)
バージョン:8.1.1
演習概要
演習タイトル:RIP
掲載ページ:P.217-222
演習概要:3つのルータを経由させて、セグメントが異なる2つのパソコンを通信させる。各ルータにダイナミックルーティング(RIP)を設定する。
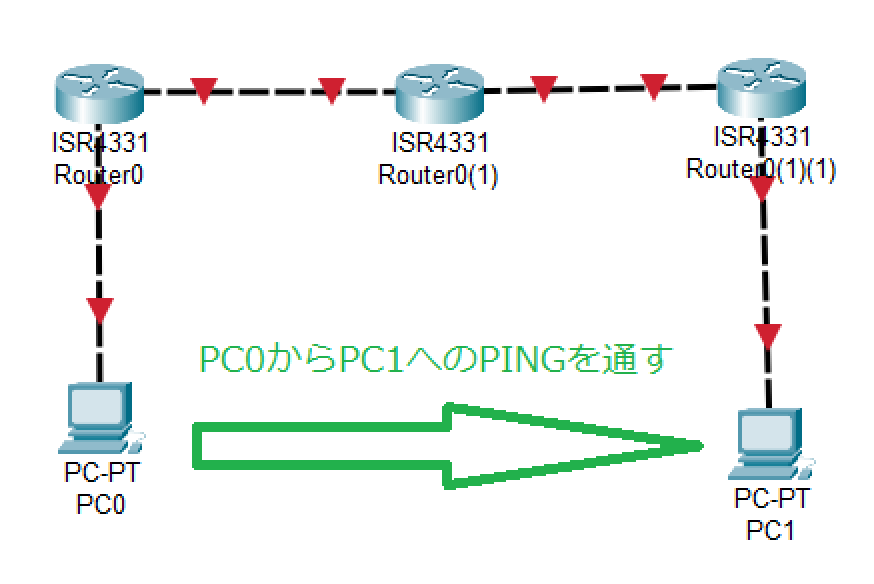
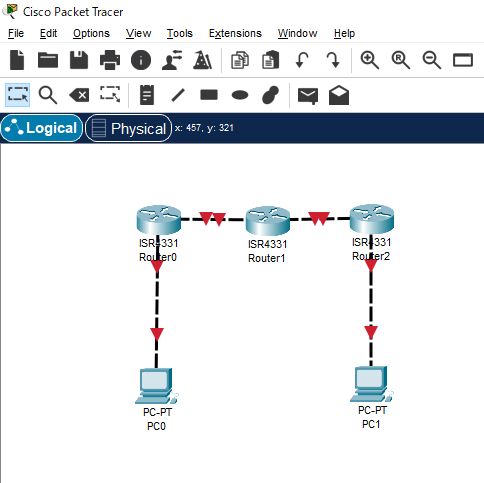
実現したいネットワーク
PC1からPC2へPINGがとぶようにルータの設定をする!
リモートネットワークの確認

各機器の配置と配線
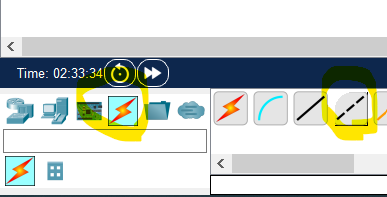
Cisco Packet Tracer 起動
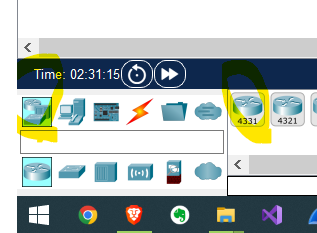
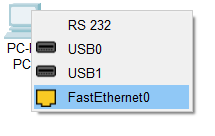
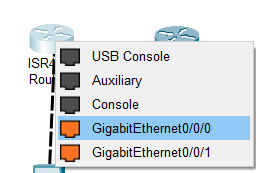
ルータ3台とPC2台を配置して、クロスケーブルにて接続する
【ルータ】
【PC】
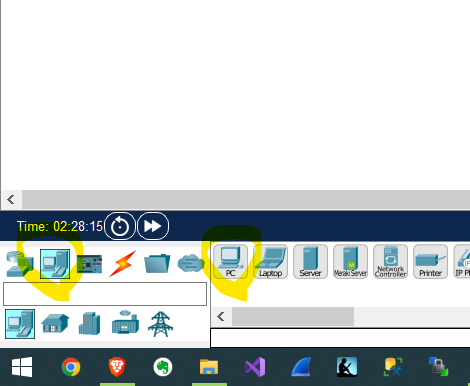
【PC】
■ネットワーク図
ネットワーク設定
各機器のネットワーク設定を行っていきます。PCの設定はGUIで行いました。ルータに関しては、CCNA勉強のため、CLIからコマンドにて設定しています。
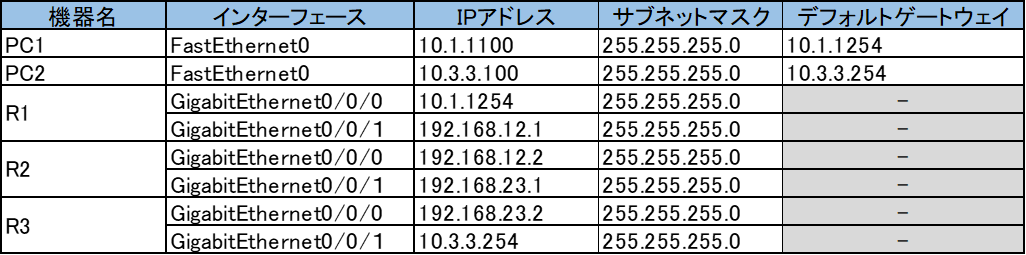
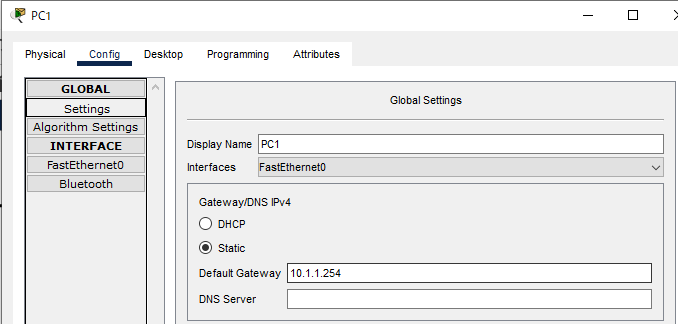
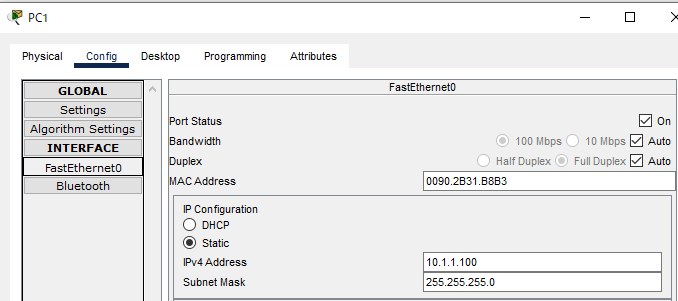
【PC1】
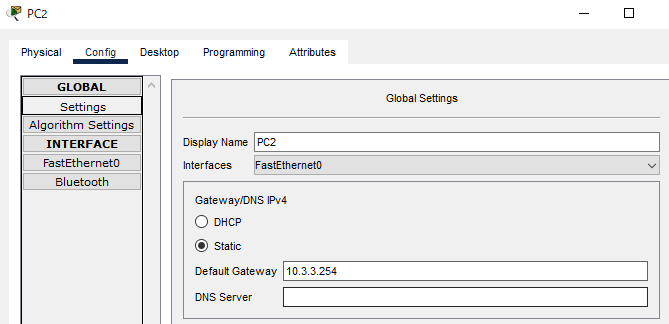
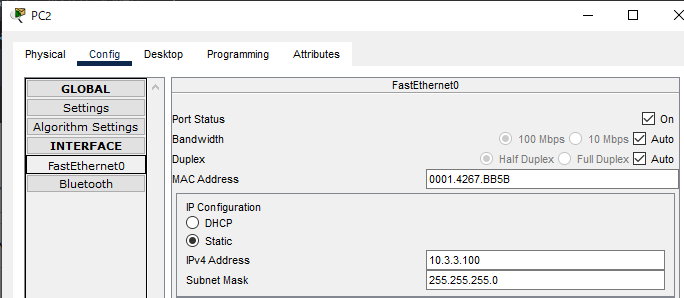
【PC2】
【R1】
Router>enable
Router#configure terminal
Router(config)#interface gigabitEthernet 0/0/0
Router(config-if)#ip address 10.1.1.254 255.255.255.0
Router(config-if)#no shutdown
Router(config-if)#exit
Router(config)#interface gigabitEthernet 0/0/1
Router(config-if)#ip address 192.168.12.1 255.255.255.0
Router(config-if)#no shutdown
%LINK-5-CHANGED: Interface GigabitEthernet0/0/1, changed state to up
Router(config-if)#exit
Router(config)#hostname R1
R1(config)#exit
//確認コマンド
R1#show ip interface brief
Interface IP-Address OK? Method Status Protocol
GigabitEthernet0/0/0 10.1.1.254 YES manual up up
GigabitEthernet0/0/1 192.168.12.1 YES manual up down
GigabitEthernet0/0/2 unassigned YES unset administratively down down
Vlan1 unassigned YES unset administratively down down
//設定の保存
R1#copy running-config startup-config
【R2】
Router>enable
Router#configure terminal
Router(config)#interface gigabitEthernet 0/0/0
Router(config-if)#ip address 192.168.12.2 255.255.255.0
Router(config-if)#no shutdown
Router(config-if)#exit
Router(config)#interface gigabitEthernet 0/0/1
Router(config-if)#ip address 192.168.23.1 255.255.255.0
Router(config-if)#no shutdown
Router(config-if)#exit
Router(config)#hostname R2
R2(config)#exit
//確認コマンド
R2#show ip interface brief
Interface IP-Address OK? Method Status Protocol
GigabitEthernet0/0/0 192.168.12.2 YES manual up up
GigabitEthernet0/0/1 192.168.23.1 YES manual up down
GigabitEthernet0/0/2 unassigned YES unset administratively down down
Vlan1 unassigned YES unset administratively down down
//設定の保存
copy running-config startup-config
【R3】
Router>enable
Router#configure terminal
Router(config)#interface gigabitEthernet 0/0/0
Router(config-if)#ip address 192.168.23.2 255.255.255.0
Router(config-if)#no shutdown
Router(config-if)#exit
Router(config)#interface gigabitEthernet 0/0/1
Router(config-if)#ip address 10.3.3.254 255.255.255.0
Router(config-if)#no shutdown
Router(config-if)#exit
Router(config)#hostname R3
R3(config)#exit
//確認コマンド
R3#show ip interface brief
Interface IP-Address OK? Method Status Protocol
GigabitEthernet0/0/0 192.168.23.2 YES manual up up
GigabitEthernet0/0/1 10.3.3.254 YES manual up up
GigabitEthernet0/0/2 unassigned YES unset administratively down down
Vlan1 unassigned YES unset administratively down down
//設定の保存
copy running-config startup-config
ルーティング設定
各機器のIPアドレスを設定したことで直接接続している機器間へのPINGは通るようになっていますが、
セグメントが異なる(PC1からR1以外など)へのPINGはルーティングテーブルへの設定が必要となります。
【R1】
//設定コマンド
R1>enable
R1#configure terminal
R1(config)#router rip
R1(config-router)#network 10.0.0.0
R1(config-router)#network 192.168.12.0
R1(config-router)#version 2
R1(config-router)#no auto-summary
R1(config-router)#passive-interface gigabitEthernet 0/0/0
//確認コマンド
R1#show ip rip database
10.1.1.0/24 auto-summary
10.1.1.0/24 directly connected, GigabitEthernet0/0/0
192.168.12.0/24 auto-summary
192.168.12.0/24 directly connected, GigabitEthernet0/0/1
R1#show ip protocols
Routing Protocol is "rip"
Sending updates every 30 seconds, next due in 4 seconds
Invalid after 180 seconds, hold down 180, flushed after 240
Outgoing update filter list for all interfaces is not set
Incoming update filter list for all interfaces is not set
Redistributing: rip
Default version control: send version 2, receive 2
Interface Send Recv Triggered RIP Key-chain
GigabitEthernet0/0/1 22
Automatic network summarization is not in effect
Maximum path: 4
Routing for Networks:
10.0.0.0
192.168.12.0
Passive Interface(s):
GigabitEthernet0/0/0
Routing Information Sources:
Gateway Distance Last Update
Distance: (default is 120)
【R2】
//設定コマンド
R2>enable
R2#configure terminal
R2(config)#router rip
R2(config-router)#network 192.168.23.0
R2(config-router)#network 192.168.12.0
R2(config-router)#version 2
R2(config-router)#no auto-summary
//確認コマンド
R2#show ip protocols
Routing Protocol is "rip"
Sending updates every 30 seconds, next due in 26 seconds
Invalid after 180 seconds, hold down 180, flushed after 240
Outgoing update filter list for all interfaces is not set
Incoming update filter list for all interfaces is not set
Redistributing: rip
Default version control: send version 2, receive 2
Interface Send Recv Triggered RIP Key-chain
GigabitEthernet0/0/0 22
GigabitEthernet0/0/1 22
Automatic network summarization is not in effect
Maximum path: 4
Routing for Networks:
192.168.12.0
192.168.23.0
Passive Interface(s):
Routing Information Sources:
Gateway Distance Last Update
192.168.12.1 120 00:00:06
Distance: (default is 120)
R2#show ip rip database
10.1.1.0/24 auto-summary
10.1.1.0/24
[1] via 192.168.12.1, 00:00:10, GigabitEthernet0/0/0
192.168.12.0/24 auto-summary
192.168.12.0/24 directly connected, GigabitEthernet0/0/0
192.168.23.0/24 auto-summary
192.168.23.0/24 directly connected, GigabitEthernet0/0/1
2#show ip route rip
10.0.0.0/24 is subnetted, 1 subnets
R 10.1.1.0 [120/1] via 192.168.12.1, 00:00:18, GigabitEthernet0/0/0
【R3】
//設定コマンド
R3>enable
R3#configure terminal
R3(config)#router rip
R3(config-router)#network 10.0.0.0
R3(config-router)#network 192.168.23.0
R3(config-router)#version 2
R3(config-router)#no auto-summary
//確認コマンド
R3#show ip protocols
Routing Protocol is "rip"
Sending updates every 30 seconds, next due in 0 seconds
Invalid after 180 seconds, hold down 180, flushed after 240
Outgoing update filter list for all interfaces is not set
Incoming update filter list for all interfaces is not set
Redistributing: rip
Default version control: send version 2, receive 2
Interface Send Recv Triggered RIP Key-chain
GigabitEthernet0/0/0 22
Automatic network summarization is not in effect
Maximum path: 4
Routing for Networks:
10.0.0.0
192.168.23.0
Passive Interface(s):
GigabitEthernet0/0/1
Routing Information Sources:
Gateway Distance Last Update
192.168.23.1 120 00:00:13
Distance: (default is 120)
R3#show ip rip database
10.1.1.0/24 auto-summary
10.1.1.0/24
[2] via 192.168.23.1, 00:00:26, GigabitEthernet0/0/0
10.3.3.0/24 auto-summary
10.3.3.0/24 directly connected, GigabitEthernet0/0/1
192.168.12.0/24 auto-summary
192.168.12.0/24
[1] via 192.168.23.1, 00:00:26, GigabitEthernet0/0/0
192.168.23.0/24 auto-summary
192.168.23.0/24 directly connected, GigabitEthernet0/0/0
R3#show ip route rip
10.0.0.0/8 is variably subnetted, 3 subnets, 2 masks
R 10.1.1.0/24 [120/2] via 192.168.23.1, 00:00:08, GigabitEthernet0/0/0
R 192.168.12.0/24 [120/1] via 192.168.23.1, 00:00:08, GigabitEthernet0/0/0
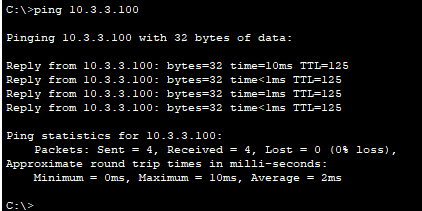
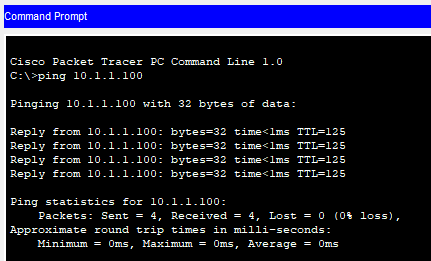
疎通確認
PC1とPC2が通信できるか、PINGコマンドを使用して確認します。
【PC1からPC2へPING】
【PC3からPC1へPING】
感想
スタティックルートを設定するのに比べ、ダイナミックルートのほうが断然楽でした。
あと、スタティックルートの場合PC1からルータ(R2)へのPINGは通りませんが、
ダイナミックルートの場合は通ります。
スタティックルートの場合、想定される通信したいエンド端末までのルートを各ルータに設定しないといけないので作業量が多いです。
参考書籍
書籍名:ネットワーク超入門 手を動かしながら学ぶIPネットワーク
著者:GENE
出版社:技術評論社


![[ネットワーク超入門]手を動かしながら学ぶIPネットワーク [ Gene ]](https://thumbnail.image.rakuten.co.jp/@0_mall/book/cabinet/6872/9784297126872_1_3.jpg?_ex=128x128 "[ネットワーク超入門]手を動かしながら学ぶIPネットワーク [ Gene ]")


